Registering an Azure AD app for SSO with Snapforms
1. Log in to the Azure Portal at https://portal.azure.com/ and click Azure Active Directory from the left navigation menu.
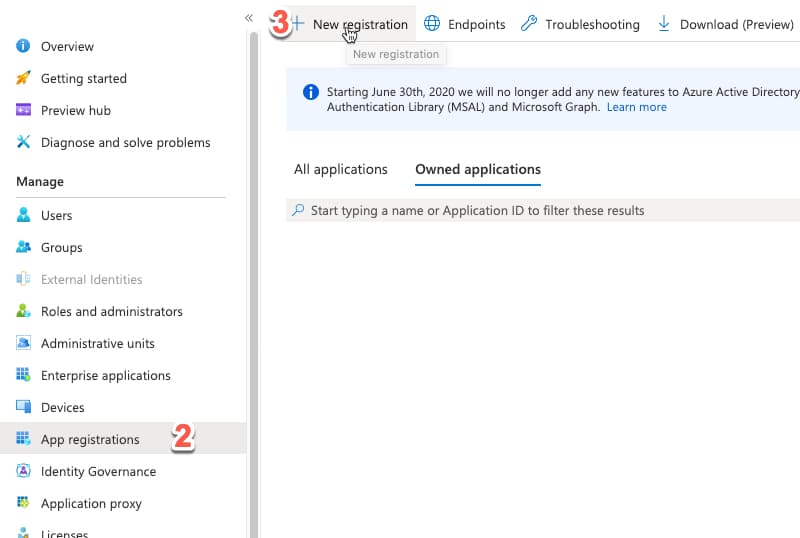
2. Click App registrations from the left navigation menu.
3. Click New registration from the apps page.
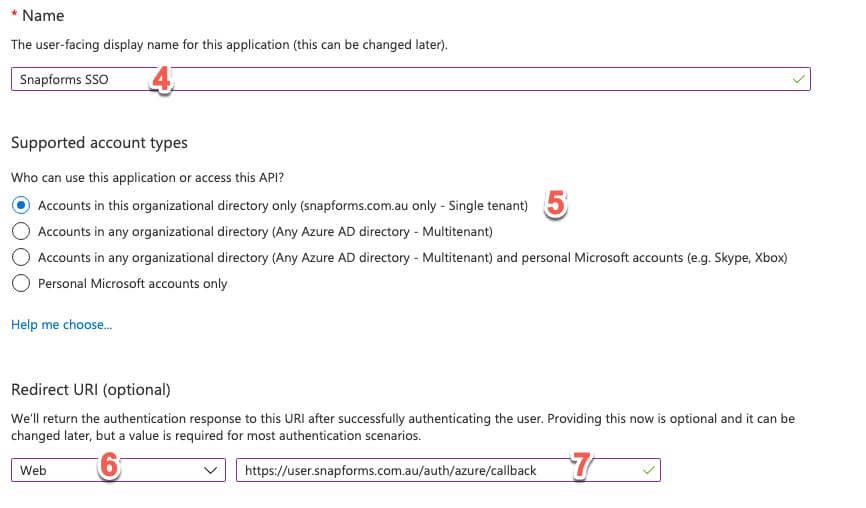
4. Choose a name e.g. Snapforms SSO
5. Select “Accounts in this organizational directory only (snapforms.co.nz only – Single tenant)”
6. Select the “Web” Application Type.
7. Add https://user.snapforms.co.nz/auth/azure/callback as the Redirect URI.
8. Click Register.
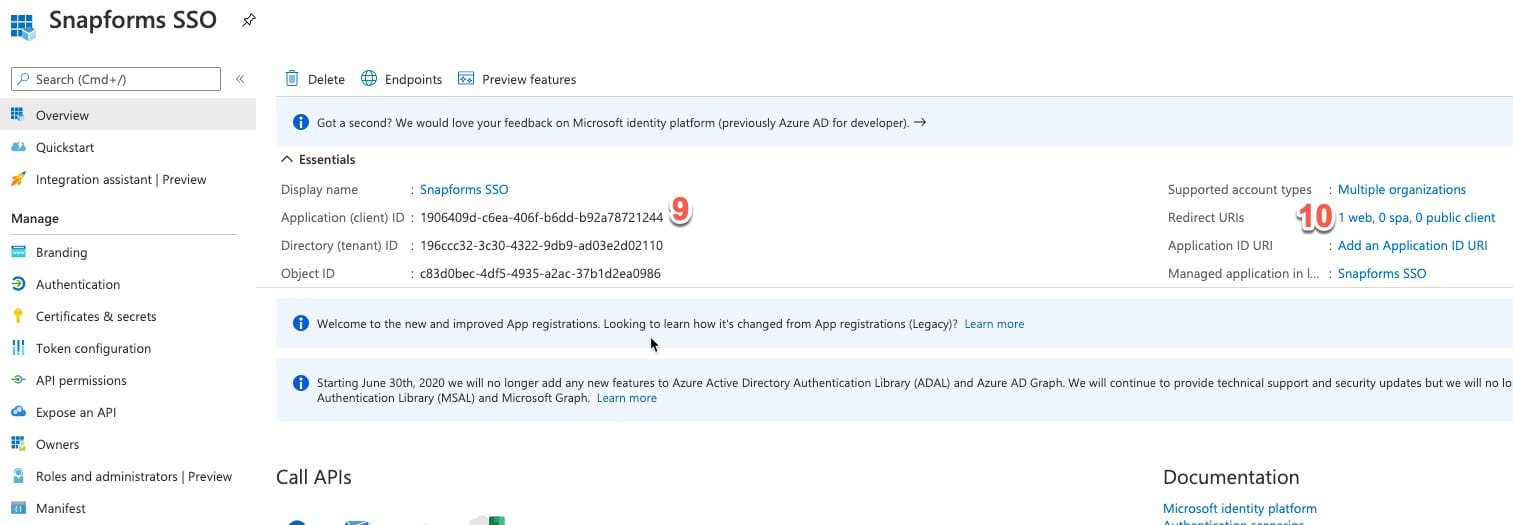
9. From registered app information screen, copy and save the Application (client) ID and Directory (tenant) ID which you will need to provide us when you are done.
10. Click in to “Redirect URIs“.
11. We will need to make sure the following Redirection URIs for the app are whitelisted here:
https://user.snapforms.co.nz/auth/azure/callback
https://[username].snapforms.co.nz/auth/azure/callback
NOTE: Please replace [username] with your Snapforms username in the last URL.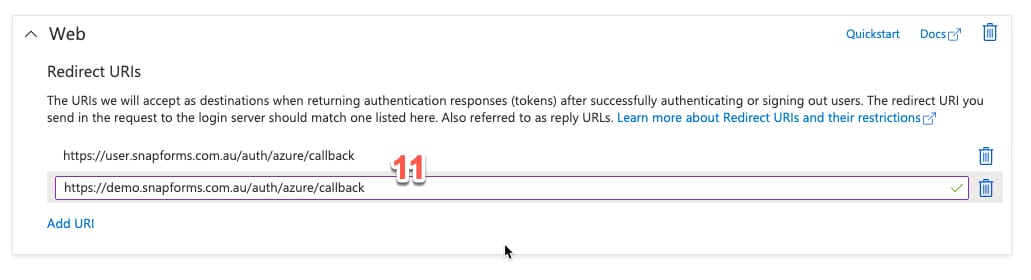
12. Click Save.
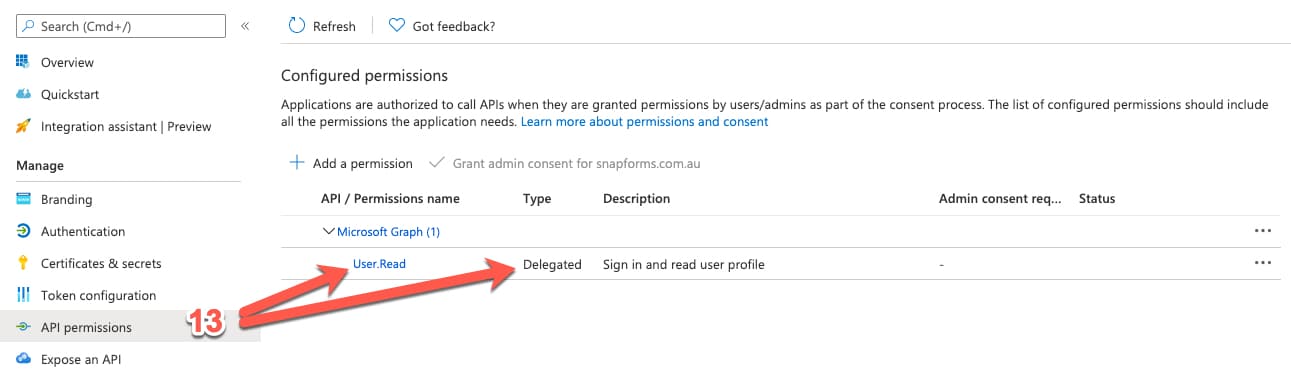
13. Click the API Permissions tab and select the permissions required for the app. We recommend the following permissions which should be there by default: Delegated permissions -> Users > User.Read
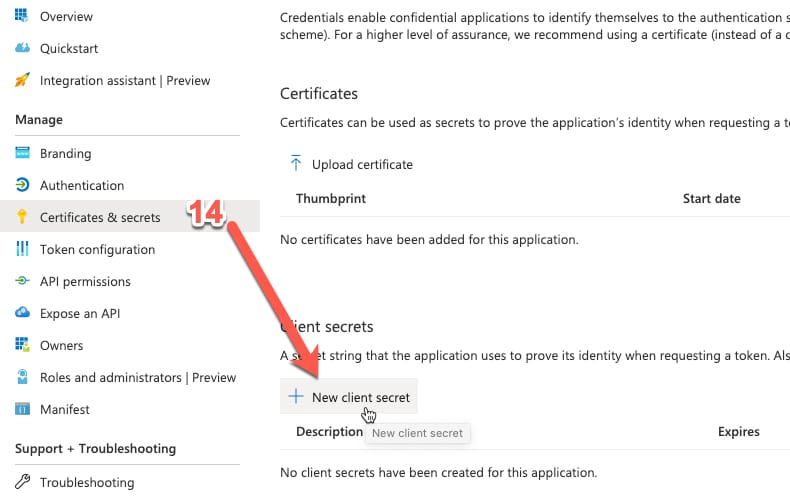
14. Go to the Certificates & Secrets tab, create a New client secret.
15. Enter a description (something like “App Secret”). Set a long duration. Click “Save”.
NOTE: If your client secret expires you will need to provide us with a new secret key or your SSO will stop working.

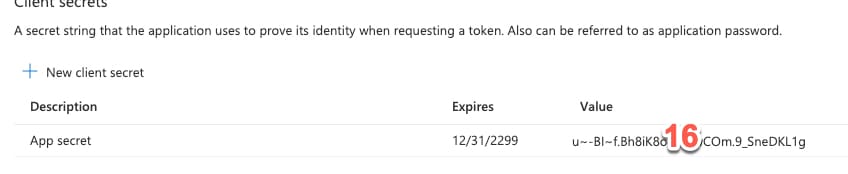
16. Copy and save the secret value. This will not be shown again. You will need to provide us with this value when you are done.
NOTE: Please ensure you have copied the secret value, not the secret ID.
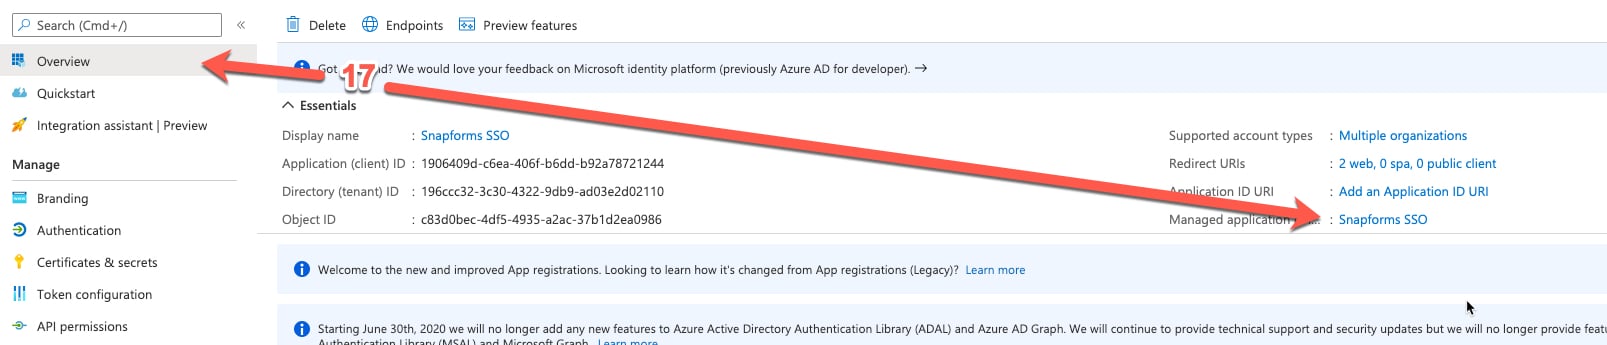
17. Go back to the Overview tab and click the name of your application next to the Managed application reference.
18. Click the Properties tab, then ensure ‘Enabled for users to sign-in’ is Yes.
You may wish to enable the ‘User assignment required‘ option if you want to specify who can log in with this app, however this is less important if your app is set to single tenant (step 5 above).
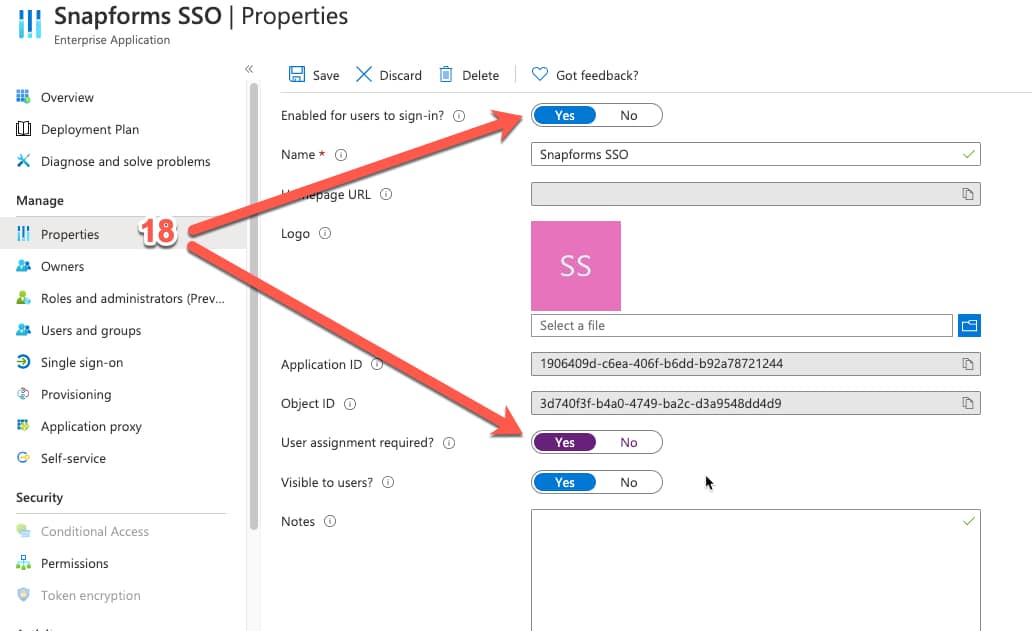
19. Click Save.
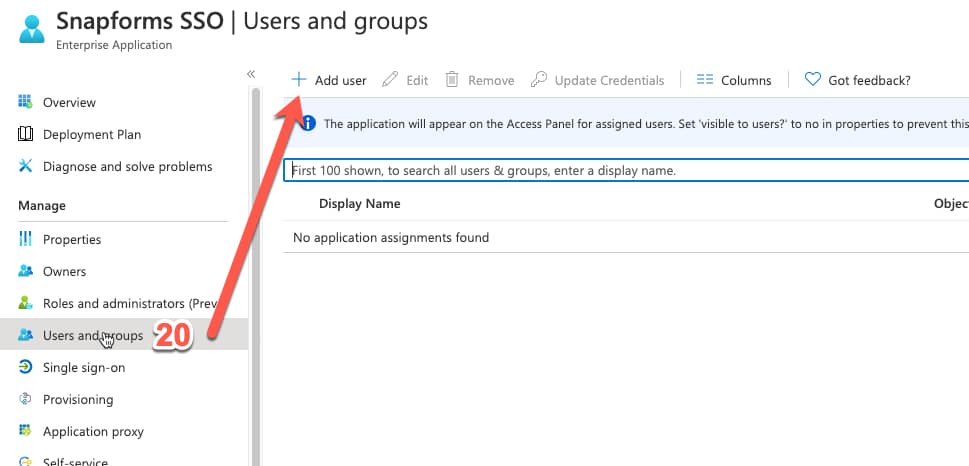
20. If you’ve set your app to require User assignment (step 18 above), Click Users and groups, then assign the users or groups who should have access to log in to Snapforms using this application.
Please contact the Snapforms support team and send through the following values:
- Application (client) ID
- Secret Value
- Directory (tenant) ID